
Mainly because blogging about it meant that I would have to clean my room in order to take acceptable photos. But I got around to it, so here you go.
This is the photo that I pinned, which originally came from here .

She already wrote a great tutorial (and so do the sites she links to) so I don't need to do that but I will explain some things and share some tips that helped me do this.
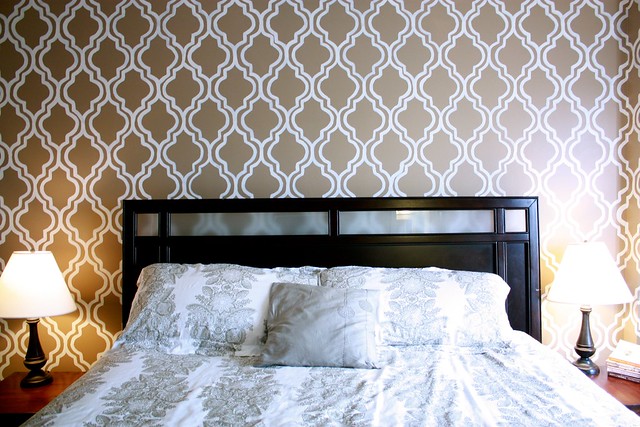
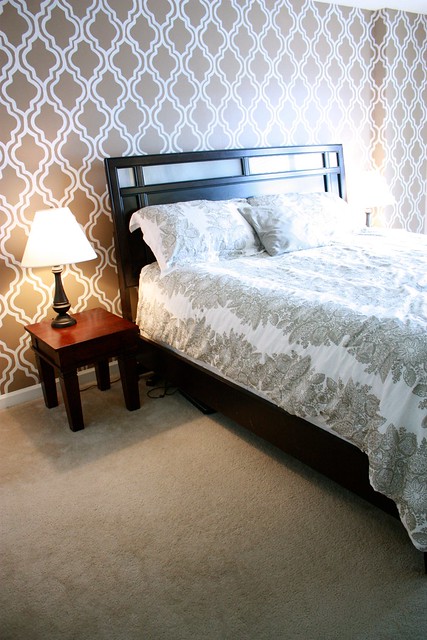
This is the finished product. Yes, it was ridiculously tedious. I probably spent about 6 days on it, working for an hour or two each day. first I painted that whole back wall in a brown shade that was a little darker than the rest of the boring beige room, to make it pop.
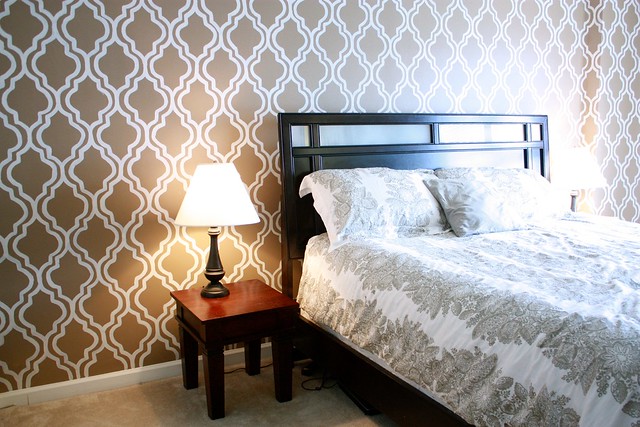
See on the right how the wall comes out for some unknown reason? Yeah, that was fun.
I printed out the pattern, slightly enlarged, and traced it onto bristol board, which is a thick drawing paper. I used chalk to trace the entire pattern onto the wall before I broke out the paint. You can wipe off chalk, but definitely not paint. I took pictures of the process, but naturally, they are lost on my computer somewhere.
The tutorial I used said to just eyeball the lines but I knew that there was just no way that was going to happen. So I made a plumb line by tying a heavy binder clip to the end of a piece of string, which was the height of the wall. Then I taped the top of the string to the ceiling, where it meets the wall. So the binder clip weighs the string down, and when the string stops swinging, it creates an exactly straight up and down line against the wall. I then taped the string in place at a few spots and traced the stencil, centered over top of the string. (Really wish I had those photos to explain this.) I traced the pattern one column at a time.
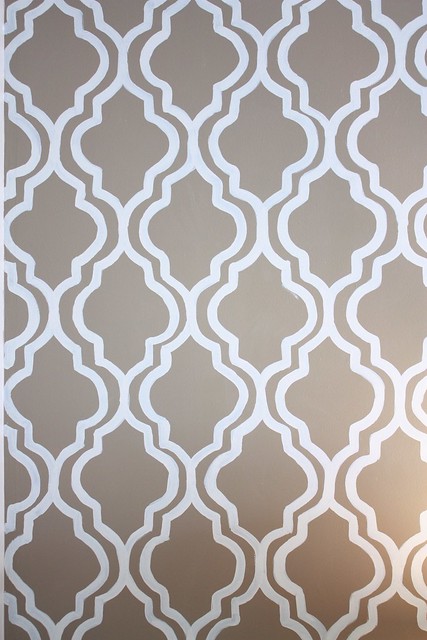
When I saw the original photo of the project, I thought, there is no way that mine is going to look perfect like that. As you can see, there are tons of imperfections up close. But when you step back, it all blends together and looks awesome.

I used Behr premium latex paint for both the brown and the white. I really suggest not skimping on paint quality, because the better the quality (and higher the price, usually) the thicker and more opaque the paint is, meaning it will look less streaky and you won't feel the need to paint over your lines.
I love it! Now I just need something for above the bed. Ideas?
Wow, how fabulous! It looks great!
ReplyDeleteThis is completely gorgeous - now I feel awful that I've been too lazy just to stencil one little wall in my kitchen! Thanks for the inspiration and great tips.
ReplyDeleteYou should definitely do it, it makes such a huge difference in the room!
ReplyDelete