Showing posts with label home design. Show all posts

Saturday, November 19, 2011

Living Room Redux

If  you've ever been to my house, you know that I can't leave a room the same color for too long. We've lived in our house for a little over two years and I've painted every room except for two of our bathrooms. And it's not like it was horrible to start. I just love how painting is a cheap way to totally change the look of a room. And I've become kiiiiiind of a pro after learning some tips from our friend who helped paint the hallways and two story stairwell (he used to be a professional painter).

So anyway, I decided I was tired of the two toned look of our living room, and wanted to lighten it up so it's nice and bright for the winter (hello, SAD sufferer). But once I had the room painted a very pale aqua, it was suddenly way too cool and bland looking. Enter Crate and Barrel and some cheap DIY tricks to add some warm orange accents. 

So here is the living room before:


And here is the after:
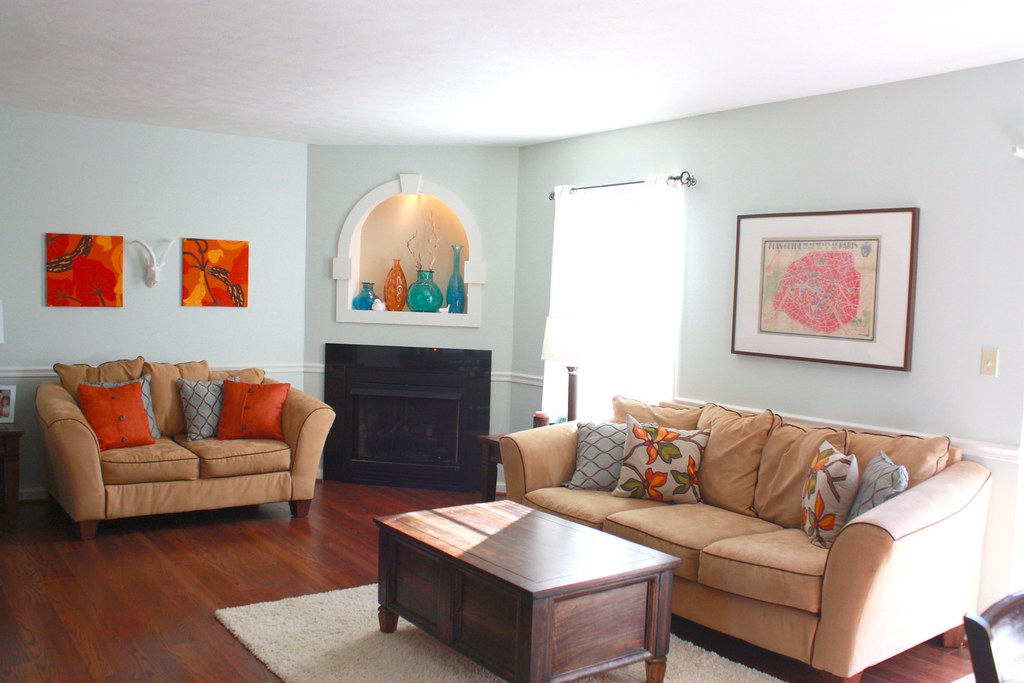

I did really love that bold teal color but it was a little TOO bold to put all over the room, and I was just over the two toned look. I am also not a fan of beige, and I think it casted a yellow tone on the room. So here's the rundown of the changes:


I kept the light blue trellis-patterned pillows (um yeah, just realized one is sideways. I'm not a photographer and I'm not an interior designer) but replaced the other ones with these bad boys from Crate and Barrel. They're just much better quality pillows and I like the more graphic and colorful look. Kept the framed vintage map of Paris above the couch. (PS - I want a sectional, BAD)
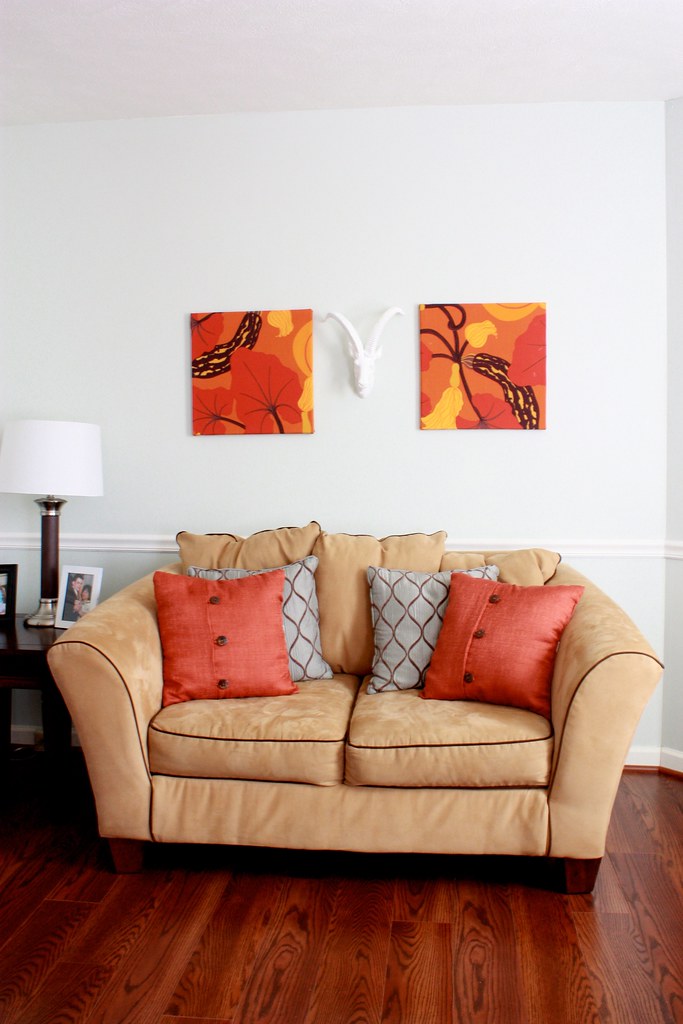

The color is totally off in this photo and doesn't really do this side of the room justice, I swear. We grabbed those rust orange pillows from JCPenney, which have the same burlap feel as the Crate and Barrel ones. And I love the buttons. See the wall art? I bought two cloth napkins from C&B that were on clearance for $8. Then I bought two square canvases from Hobby Lobby and stretched them on it, using a staple gun on the back.
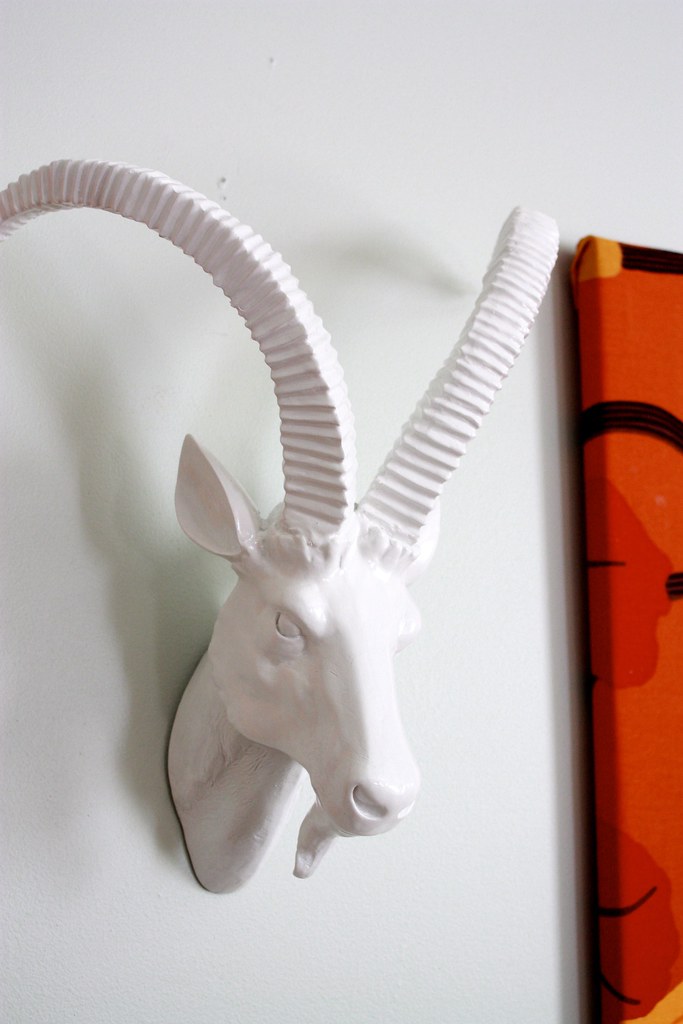

I'm kind of in love with this antelope/gazelle/goat? head from Home Goods. Frank looked at me like when I was completely insane when I plucked it off the shelf and said, "I'm getting this, now," without any consideration. I think he kind of loves it now :) Plus I knew it would look awesome because I saw it's distant cousin here. I share the white ceramic animal obsession, it's a sickness


The lighted nook above the fireplace didn't change much, I just cleared some clutter and added this orange vase that I found at Marshalls.


Here's the surprise! I did paint this wall the light aqua color to begin with, but it felt like one big long blue room. So I decided to use some leftover brown paint to do an accent wall, in order to kind of separate the dining area from the living room area. I LOVE it! This photo really is horrible though, I suck at Photoshop. The paint is definitely warmer and slightly darker and really contrasts with the white chair rail.  


The artwork is the same stuff that used to be above the the loveseat. They are pages from an old atlas that I bought at an estate sale. The matting on it was white before, so to make it pop a little more, I grabbed some fabric that I already had and just wrapped the mats. 

And here's a picture of Little Man sleeping on the dining room table, because he has no manners.


Thursday, August 4, 2011

My Pinterest Challenge!

Sherry and Jon from Young House Love and Katie Bower from Bower Power are kindddddd of like blogging celebrities to me, and I'm sure they are to a lot of you too. These were the first two blogs that I ever followed, before I even knew what a blog was, when I bookmarked things rather than put them in my Google Reader (or RSSOwl on my Macbook). So when I saw that they were joining forces to do the Pinterest Challenge, I almost peed my pants. Because I totally did that! They are both Pinterest-obsessed like so many of us and decided to challenge themselves and their readers to pick some project that they pinned and actually do them. I've done a few Pinterest projects but I've been waiting to blog about the most major one for a while.

Mainly because blogging about it meant that I would have to clean my room in order to take acceptable photos. But I got around to it, so here you go. 

This is the photo that I pinned, which originally came from here .  

She already wrote a great tutorial (and so do the sites she links to) so I don't need to do that but I will explain some things and share some tips that helped me do this.


This is the finished product. Yes, it was ridiculously tedious. I probably spent about 6 days on it, working for an hour or two each day. first I painted that whole back wall in a brown shade that was a little darker than the rest of the boring beige room, to make it pop.


See on the right how the wall comes out for some unknown reason? Yeah, that was fun.

I printed out the pattern, slightly enlarged, and traced it onto bristol board, which is a thick drawing paper. I used chalk to trace the entire pattern onto the wall before I broke out the paint. You can wipe off chalk, but definitely not paint. I took pictures of the process, but naturally, they are lost on my computer somewhere. 


The tutorial I used said to just eyeball the lines but I knew that there was just no way that was going to happen. So I made a plumb line by tying a heavy binder clip to the end of a piece of string, which was the height of the wall. Then I taped the top of the string to the ceiling, where it meets the wall. So the binder clip weighs the string down, and when the string stops swinging, it creates an exactly straight up and down line against the wall. I then taped the string in place at a few spots and traced the stencil, centered over top of the string. (Really wish I had those photos to explain this.) I traced the pattern one column at a time. 


When I saw the original photo of the project, I thought, there is no way that mine is going to look perfect like that. As you can see, there are tons of imperfections up close. But when you step back, it all blends together and looks awesome. 

I used Behr premium latex paint for both the brown and the white. I really suggest not skimping on paint quality, because the better the quality (and higher the price, usually) the thicker and more opaque the paint is, meaning it will look less streaky and you won't feel the need to paint over your lines. 

I love it! Now I just need something for above the bed. Ideas? 


Wednesday, March 23, 2011

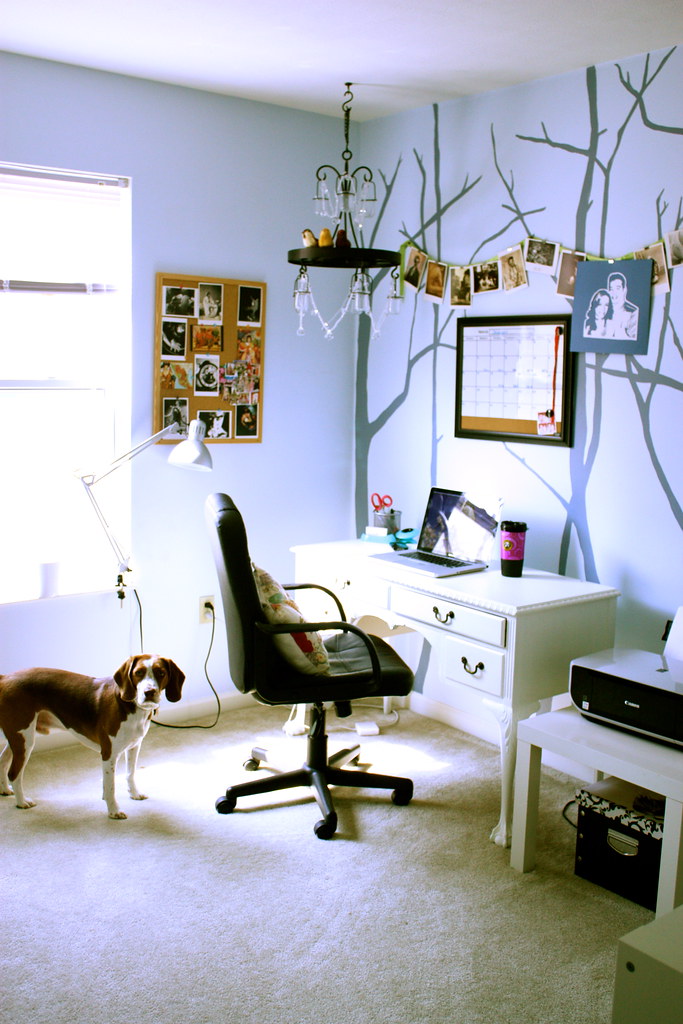
House Tour: My Office

My office is usually pretty sad looking. It becomes a dumping ground for everything that I don't know where to put. However, I've recently gotten back into using my office to work in, because I'm more productive. It feels like I'm actually sort of "going to work". So I decided to clean it up and get a fancy new bookcase from IKEA to help organize. I think this might be my favorite room in the whole house. This is probably because the room is totally me. I don't worry about design or making it look "grown up". I just do what I want and surround myself with things that inspire me.


Okay, this is the view you get when you're standing in the doorway. The color is way off, I'm not sure why, but the colors in the next photos are pretty accurate. Wilbur demanded to be in a lot of pictures.


Let me explain everything you see here. The desk is one of my favorite pieces of furniture. It is an antique and was owned by my great grand grandmother (?) or maybe it was an aunt. I can't remember. But we do have a photo of her sitting at it, wearing a corset and a giant feathered hat, looking rather intimidating. It was a deep mahogany color but I stripped it, sanded and refinished it, painting it white. It even has little claw feet, one of which had snapped off but I was able to reattach it with wood glue.

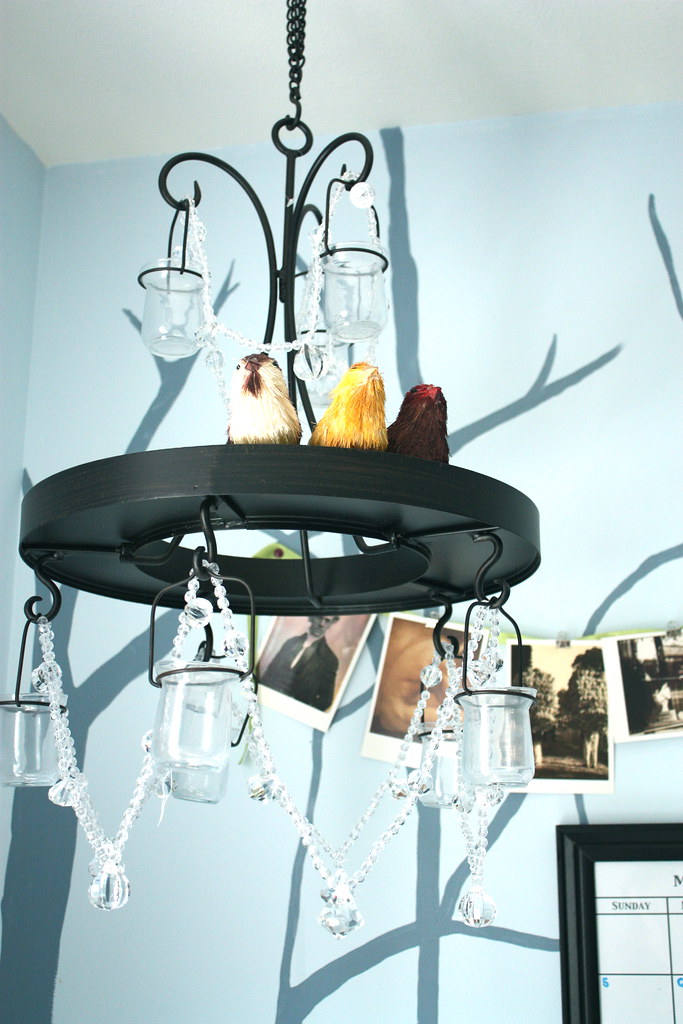
My sister in law bought me the chandelier from Southern Living at Home. I strung the fake crystal beads and strung them around it to make it look fancier. I also hung a piece of ribbon on the wall and I'll attach art postcards, magazine clippings, photos and artwork to it. You can't really see it, but there's a lumbar pillow on my cheapo Walmart desk chair. I made it by taking the stitching out of one side of a Pier One clearance cloth placemat and stuffing it.
A closeup of the pimped out chandelier. I bought these natural fiber birds from Pottery Barn. They were supposed to be Christmas decorations but landed up here.


Here's a closer look at the ribbon and postcards.

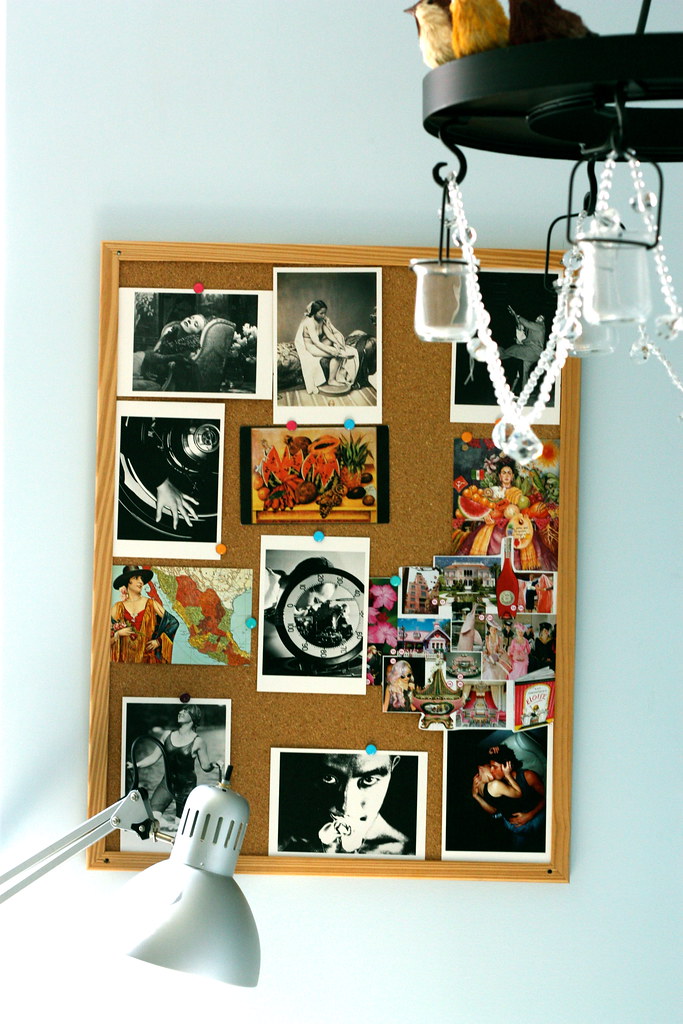
More randomness on a bulletin board above my desk. Sometimes you need a photo of a guy eating a flower for inspiration :). 


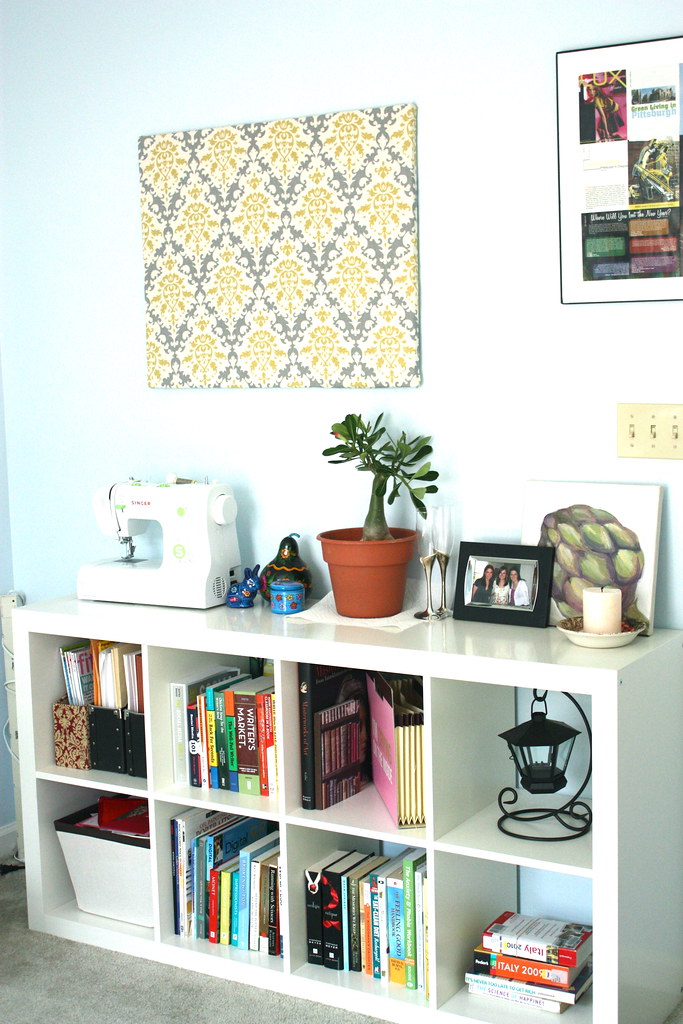
Moving along, this is the wall that is to your right if you're sitting at the desk. I love this new shelf/storage unit from IKEA. It's super sturdy, functional and was only $69. I needed something to fill up the wall space, so I stapled some scrap fabric to a big art canvas I had. I finally have a place to keep my sewing machine, and I plan on making a cute cover for it. There is some pottery I collected when we went to Mexico, a dessert rose which may or may not bloom, champagne flutes from my wedding, a picture of my sisters and I, and a painting of an artichoke that I never finished. Also not the random books that include my "work books" as well as some books that I was too embarrassed to keep on the book shelf in the guest room, like the Twilight series and diet books haha. Also, long overdue library books! That frame on the right displays some of my first published articles.


More storage space to the right of the door for some of my art supplies. I love IKEA storage stuff. Above is the banner that I made for Valentine's Day and didn't want to part with. 

That's everything. There's a closet to the right of the small bookshelf but it's a complete wreck and I won't be showing the inside of it! Add some Pandora, a cup of coffee, light a few candles, and this is the perfect place to get some work done. Or in most cases, distract myself on Facebook or Google Reader. 

Saturday, February 6, 2010

Making a Splash

For a townhouse, our kitchen is a decent size. Especially since I was accustomed to the 3′ x 4′ galley kitchens that graced my previous apartments. There is plenty of counter space, a nice sized pantry and room for a casual dining setup. It looks a little something like this:

Your standard builder-issued cabinetry and all white appliances. I would have preferred stainless steel, but we can’t justify buying all new appliances when these are less than a year old and work great. So for now, they will stay. The walls are a light sage green which i didn’t totally mind for a while. But pretty soon, I was itching to paint. I wanted something warm and cozy. So the kitchen turned into this:

Sorry for the terrible pictures. I should be getting a good camera for my birthday, I think (hint hint). Its hard to get a true feeling of the color from the pictures, as it looks different in all of them. Its basically a warm, spicy terra cotta color. We always buy Behr paint and decided to try the paint and primer in one. It went on like buttah, seriously. The paint is so smooth and rich, i love it. But . . . I’m not sure if i would go with it again. Even though you aren’t supposed to need primer, I think that the paint would have a lot more durability if i had primed. There’s already a spot next to the dog’s bed, where the paint has scratched off. I think it is from his chewed up bone rubbing against the wall. Not too happy about that. I was really afraid that the paint color was too close to the cabinet color, but i ended up loving the look. It kind of blends together in a good way.

I also tackled a tiled backsplash. I have never done tiling before but it was pretty painless. The grand total for all the supplies ended up being around $200. I really love how it looks. It is one inch glass mosaic tile. The glass is different shades of coppers and browns and is incredibly shimmery.

We also found that decorative shelf on clearance at sears for $7. It is self-leveling and super easy to install. It also made a great home for some of my white ceramic animals. I love the contrast of the white against the wall.

I have since taken down the flourescent light fixture above the sink (gross) and replaced it with a spotlight fixture that I found at IKEA for 9.99. Win! I would love to get some under-cabinet lighting to illuminate the backsplash. Its not really living up to its potential yet.

Things I still need to do in the kitchen:

- Tackle the curtain situation . . . these ones came with the house and they suck

-Paint the chairs white. I love my white pedestal table (from the as-is room at IKEA!) but haven’t gotten around to painting the chairs to match. I have a feeling this will be a project for when the weather starts to warm up.

-Maybe a cute jute rug or something to break up the vast whiteness of the floor

-More decorative kind of stuff

-Install hardware on the cabinets

Monday, February 1, 2010

Trellis Jealous

I’m addicted to trellis patterns right now. There are worse things I could be addicted to, like cigarettes, crack, American Idol. But right now, this is what i’m craving:

and a little bit of this . . .

and a whole lot of this . . .

Z Gallerie Labyrinth Pillow

However, after the back splash tiling project (which i will post about later) and painting every room in the house, plus millions of other little home improvement projects that I always have going on, I promised the man that I would go on a temporary spending freeze. The man is always getting me down.

I have noticed lately that the living room has been missing something. I finally figured it out the other day. We needed something on the wall above the couch. It was just a big gross patch of beige paint. Since we only bought our house in May, I have been wary about putting too many holes in the walls because i just want them to look smooth and unblemished forever. So there isn’t much hanging out on the walls. We definitely needed some kind of accent piece though, so I set out to look for something that would go great on the wall. Something bold, colorful, possibly geometric . . . TRELLIS!

(Edit: Do you ever have moments when you realize that your parents were right? I hate that feeling. My mom used to forbid us from putting holes in our walls. It is pretty difficult to hang 1000 TigerBeat centerfolds of Leonardo Dicaprio, Jonathan Taylor Thomas and Andrew Keegan’s flowing locks when you can’t put thumbtacks in the wall. Totally know where you were coming from, Mom. Thank God for Scotch tape.)


This would be a great way to introduce some trellis love into the living room. My go-to quick art solution is to cover an art canvas with some beautiful fabric. However, the selection at Joann fabrics was seriously lacking and I didn’t want to wait the few days for shipping if I bought fabric online. Because I am impatient. Ridiculously impatient. When I get it in my head that I want to do something, it can’t wait one more second.

Soooo I headed over to Michael’s to look at their art canvas selection. I wanted something pretty big, but a giant canvas would have put me back 4o bones or more. Next stop, IKEA, and my favorite room in the world . . .

IKEAfans.com

The AS-IS room! I check this place on a weekly basis because the deals are great and most of the merchandise is salvageable. The IKEA gods must have been smiling down on me that day. Right there in the back of the room was this:

IKEA Ribba frame

The plastic inside the frame was slightly warped so I scored this giant frame for under $10. I took it home and stretched some canvas over the frame, used a staple gun to hold it in place, and my own art canvas on the cheap. Now here’s where it gets a little dicey. I know that you need to prime a canvas before you paint it. However I didn’t have any art canvas primer and I really wanted to use what I had on hand. I slapped a thin coat of latex interior wall primer on the thing. Don’t be mad at me. Oh wait it gets worse. Then I painted the pattern on with interior latex paint, so that it would precisely match the lower half of the wall. And guess what, haters? It worked brilliantly! Here are some pictures of the progress:

I’m pretty happy with how it turned out. I love large-scale prints and I never would have found a fabric that would have been that large. It will stay until I move on to a new obsession. And as I’m sitting here staring at the picture, I decided I need to make some pillow covers for the two small tan pillows. Way too much tan going on there. It never ends, does it?

Saturday, January 2, 2010

Mandatory Introductions

I hate introductions, so here is what this bloggity blog will entail:

Arts and Crafts

I have been an arts and crafts junky since I first discovered pipe cleaners. I’m one of those people who looks at something in a store and thinks, “Twenty dollars for a throw pillow?! I could make this!” I’ll share my crafty successes and failures as well as some how-to tips.

Home Improvement/Design

My husband and I bought our first house about eight months ago and it’s still so exciting. I’d love to tell you that it’s a cute little cottage and that we have eco-friendly bamboo floors as well as rustic details left from the generations of people who have lived in it. But alas, it’s a two story townhouse in a planned community with a bunch of young families and yuppies. What makes it even sadder is that it is built on the top of a giant hill in a historic town that was ravaged by floods and never quite revived. So all the townspeople look up at us in disgust. They fought the development for years. But I don’t care. I have lived four different apartments in the last five years, so I was ready for walls that I could paint. My DIY attitude makes me believe that I can tackle any home improvement project. Sometimes they work.

Random

It’s inevitable that some of my daily life will creep into this blog. I’ll try to keep the “Dear Diary” entries to a minimum, but this is mainly for me to keep track of my life.

My Career

Not sure how much I’m going to delve into this topic. It would probably be boring to most readers. I quit my job as an accountant about a year and a half ago and have been trying to make it as a freelance writer. I don’t feel like I’m anywhere near there, but I have big dreams. And I’m making some progress. So I’ll probably use this space to gloat when I get new gigs or new articles published. That shit doesn’t fly on Facebook, but this place is all about ME.

Fitness

I’m trying to get in shape and just become generally stronger. Why should you care? Because looking at my progress will probably make you feel better about yourself. I was always the girl picked last in gym class. No, really. It always came down to me and the morbidly obese kid that smelled like hot dogs. And they always picked the fat kid first because he could at least come in handy defensively. I was the skinny, quiet shy kid until college, when I miraculously became the outgoing, newly formed beer gut kid. I blame most of this transgression on my boyfriend (now husband) and PBR Light. I hate working out and I hate the gym, so you should be able to get a few laughs out of my pathetic attempts.